In this guide, you’ll learn how to add and control any compatible smart devices easily using Google Assistant. Whether you have a Google Home, Google Home Mini or any Smart speaker that works with Google Assistant, you can add them with some simple steps.
This guide also includes:
- Control any Google Assistant compatible device
- Set up your Google Assistant to your Smart Speaker
- Customize each room of your house to set routines
With this actionable step by step guide for your Smart Home, you’ll control your house in no time.
I will walk you through all the steps of the process and before you know it, you will be in full control of your Smart Home.
Add a device to your Google Assistant Smart Speaker
First off, I guess you already have a Smart Speaker with Google Assistant running. This device will become the “brain” of your home, controlling any smart device.
If You don’t, getting set up is very simple:
- Connect your Google Home Smart Speaker to the energy.
- Download and run the Google Home app on any device you have. Whether it is iOS or Android, it got you covered.
Set up your device
First, you will set up your Smart Home device according to the manufacturer’s instructions. If you own a smart bulb or a smart lock, make sure you are up and running.
You need to be sure that your device is compatible with Google Assistant. Usually, you can see it in the box the specification. Google has grown this list over the years and your device probably will be listed.
Setting up the device is most of the time very easy to set up. Just connect the power cable and to your WiFi. Some of them come with an app where you can access all the product’s features.
Some gadgets require a Hub to work. Philips hue lights are a good example, but the process is the same, just connect to the energy and your WiFi and you are pretty much done.
Add the device in the Google app
Google App is mostly the same for Android and iOS, so this process will be almost the same for both.
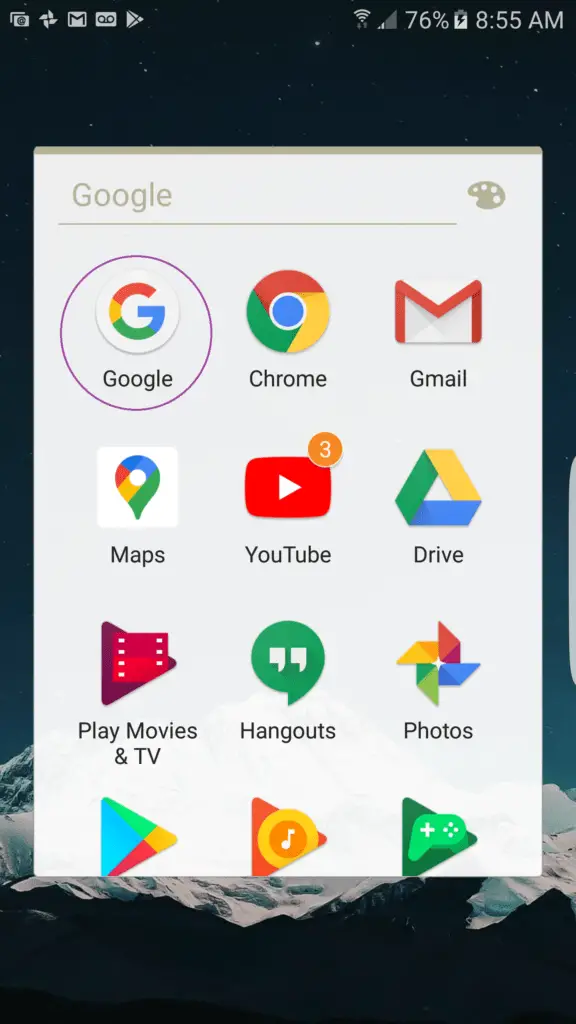
First, you need to access the Google App:
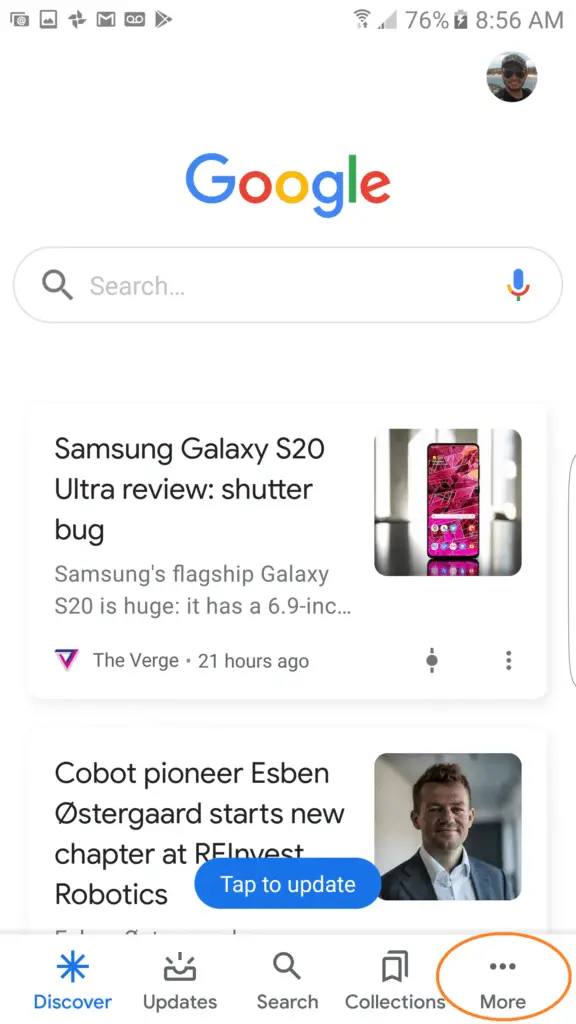
You’ll see the Google news feed. Then, just tap “more”
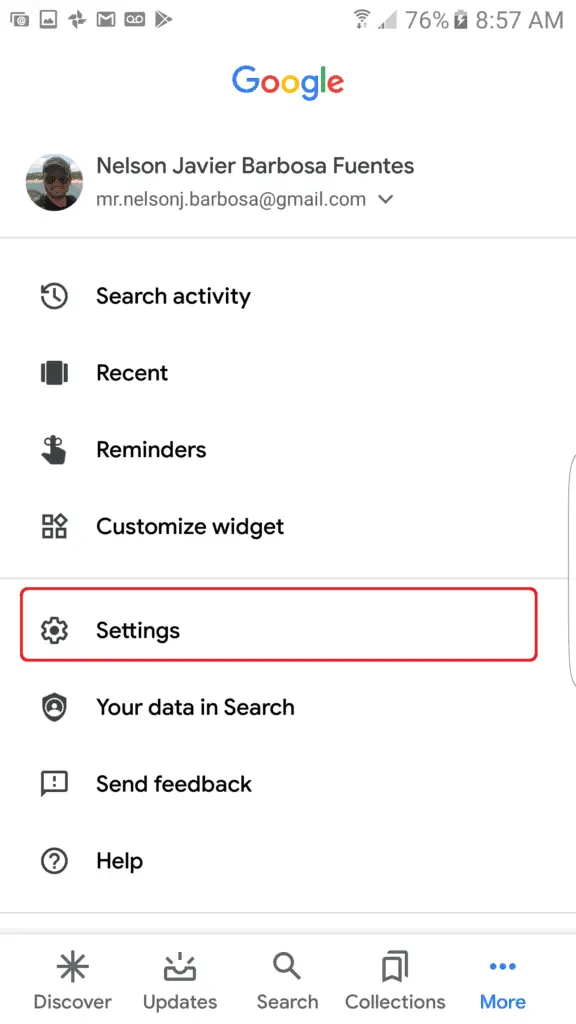
You will access your profile. Now, tap “settings”
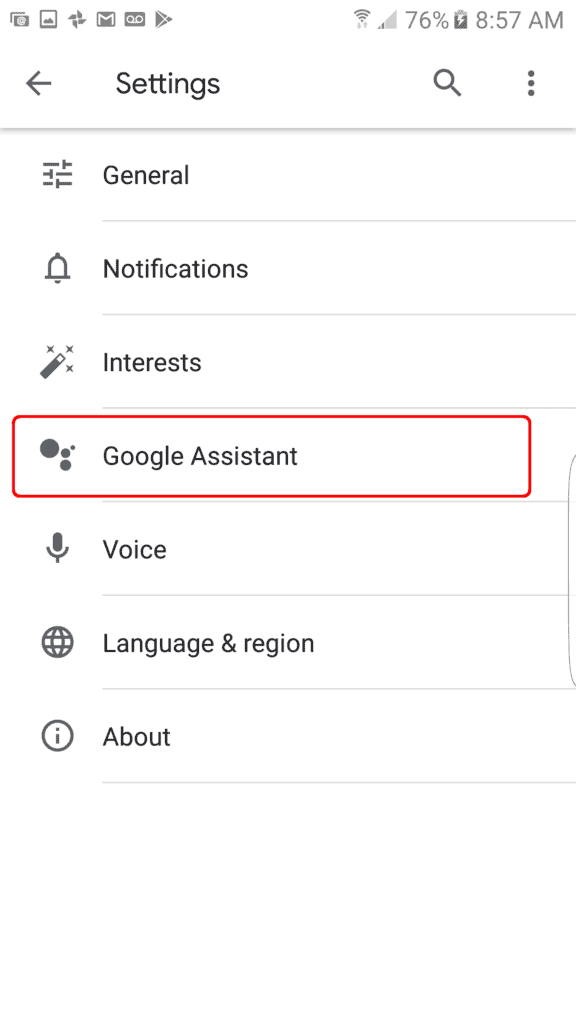
Access “Google Assistant”
You’ll be on your Google Assistant profile. Tap “Home” and then “Add”
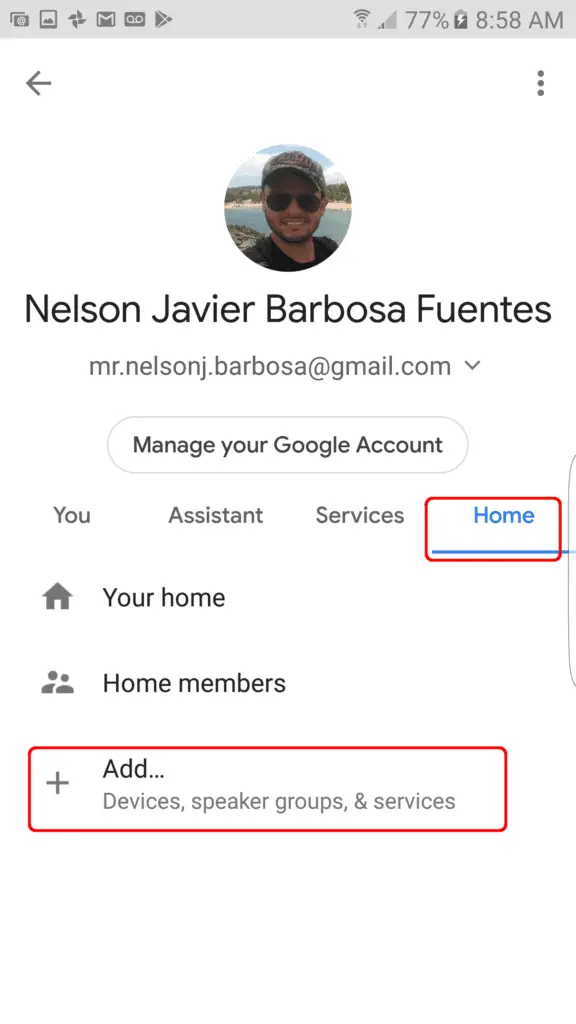
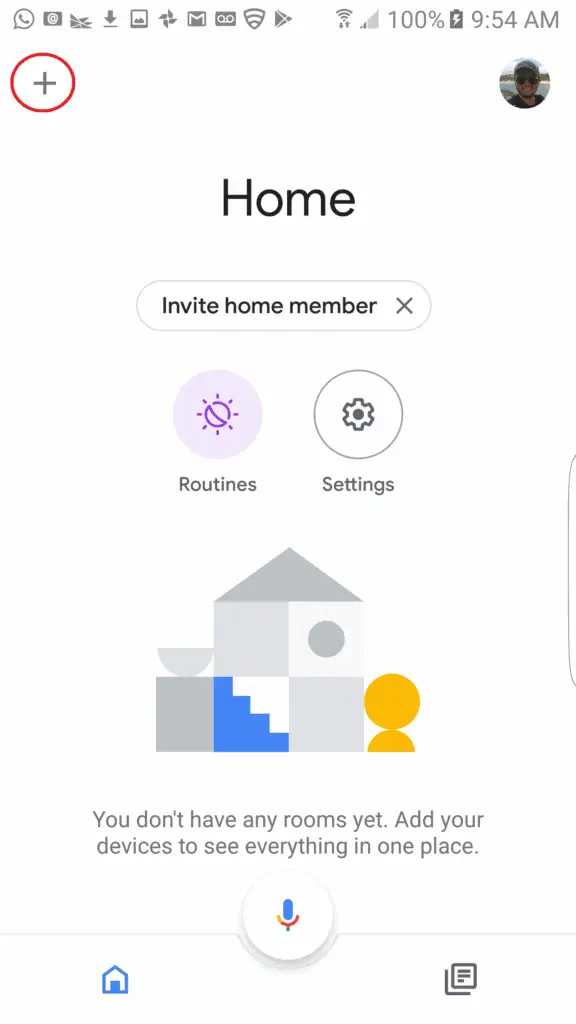
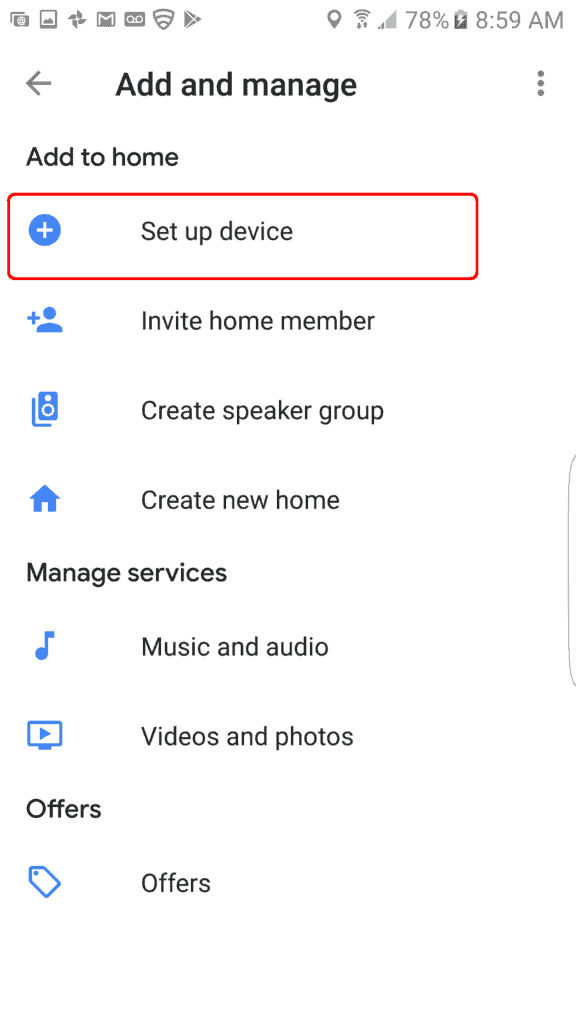
It will send you to the Google Home App. If you don’t have it installed, please go ahead as a regular app. Then, open it and tap the “plus (+)” and then “set up device”
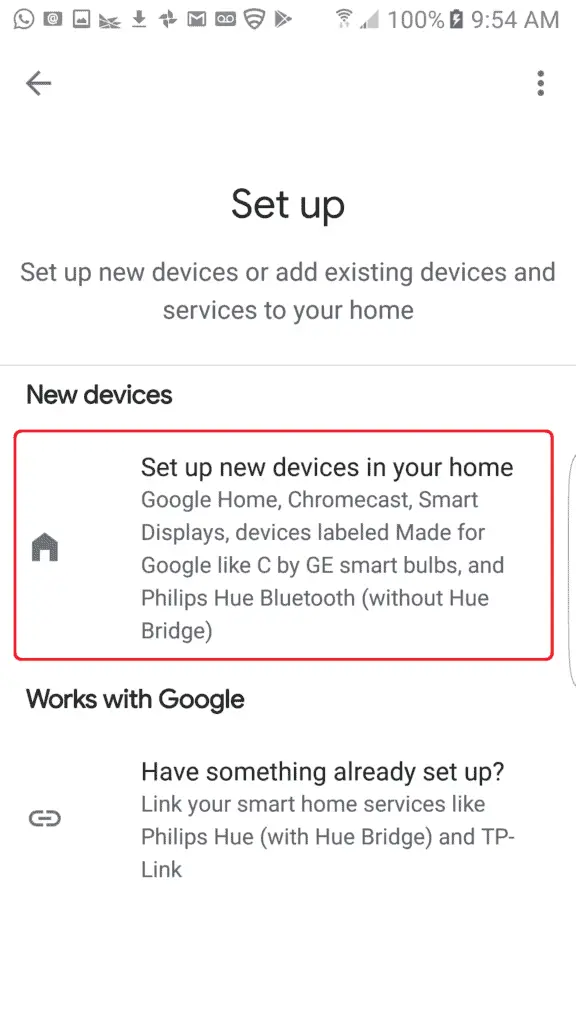
Now, you will set up a new device. Tap the first option if you haven’t added it previously
It will group all your devices in “Home”. Tap “next”
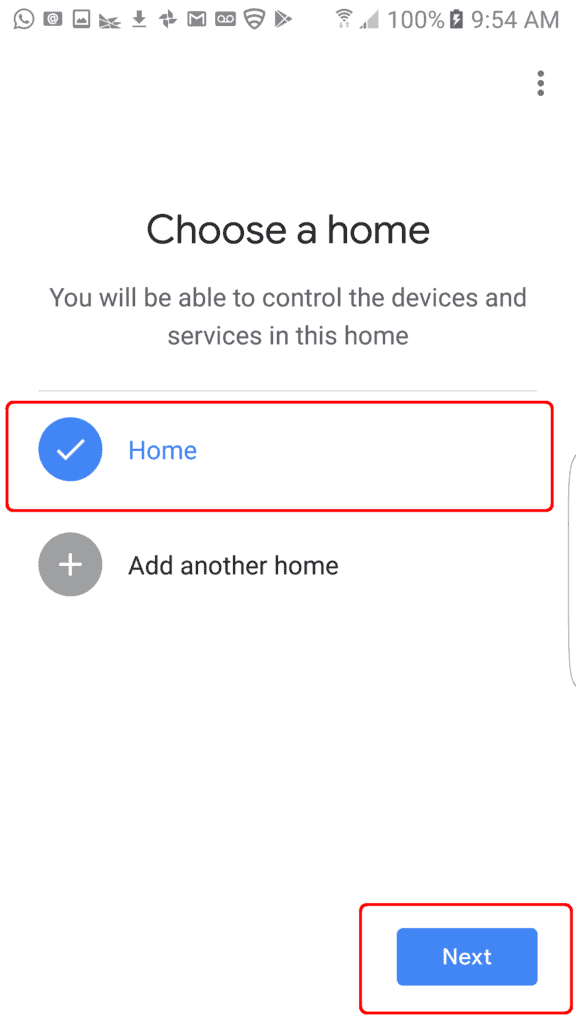
From this point is pretty much straight forward. The app will scan all the devices connected to your WiFi and show it on the App. You will add them and now you can use as you will.
Personalize your devices in the Google App.
The google home app gathers all your devices per room, giving you the ability to have a better understanding of your Smart Home.
If you tap those devices, you can see some options like volume for your Smart Speaker, dim lights and so on
You can easily personalize them by changing their names. Once done, instead of using standard product names on your voice commands, you could change them per room.
For example, a Philip Hue light could be called: “main living room lights” and Google Assistant will interpret it differently.
Add devices to each room of your Smart Home in the Google App
After adding the devices to the Google app, you can arrange them per room to personalize them even better.
If most of the smart gadgets are in the living room, you can organize them and set routines.
To change the name of the room, tap the room and hit change name. Customize it as a “master room” or “guest room” depending on your house configuration.
Conclusion
Google has designed its Smart Speakers to be very user-friendly and with high compatibility. Customization can be taken beyond our imagination. After learning how to add the devices, you are pretty much set up to start automating everything at home. It will become very interesting and a side project for your weekends!
If you find it useful, please let me know in the comments below!
