
Homeowners new to smart security are following the smart doorbell trend en masse.
These devices allow you to keep a safe distance between yourself and visitors while still seeing and communicating with them. But how do you install a smart video doorbell?
To install a smart video doorbell, you need a screwdriver, drill, pliers, and to shut your power off temporarily. Charge the doorbell, attach it to the door frame with a mounting bracket, screw it in, and then set up your doorbell on the app (ex: Ring). You may need to configure your chime box, too.
This article will teach you how to install wired and wireless smart doorbells.
We’ll also discuss the benefits and drawbacks of installing your smart doorbell yourself instead of hiring an electrician to do it for you! If you’re curious about installing a new smart video doorbell, read on!
Smart Home Video Doorbell Installation
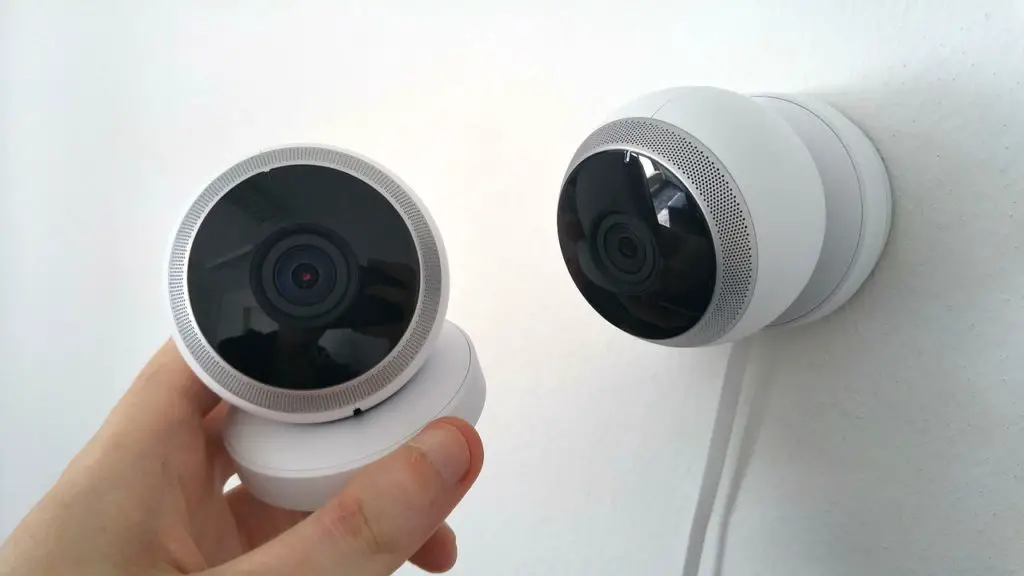
A video doorbell is one of the most efficient forms of surveillance any modern home can have.
However, if you’ve never installed a doorbell before, the process can feel a little intimidating.
Lucky for you, installation isn’t too challenging. All you need is a smart doorbell and access to your home’s wiring.
There are two basic smart designs: wireless and hardwired.
Let’s review how to install both below:
How To Install a Battery-Powered Smart Doorbell
Battery-powered video doorbells are typically less costly than hardwired ones, making them a great alternative if you already have wiring in place.
Certain battery-operated video doorbells provide power terminals for easy connection to your home’s doorbell wiring if desired.
Below, we’ll explain how to mount a battery-powered doorbell using its included tools.
Fully Charge the Doorbell’s Battery
Before mounting your doorbell, charge it completely (100%).
Most wireless smart doorbells have a micro USB cable for charging the battery. However, certain doorbells have a detachable battery pack that you can remove without disassembling the entire doorbell.
Battery life varies by model and the amount of data the doorbell recorded.
The battery life can generally range from a few days to six months.
Attach the Doorbell to Your Door Frame
The bulk of video doorbells have a mounting frame that you can attach to your home’s exterior.
If you choose to hang the mount on concrete, you’ll need to use advanced anchors and drill bits that manufacturers may not include with your device.
Fix the doorbell to the mounting bracket until it’s securely in place.
Then, insert the security screws into the bottom of the doorbell. You might need a special screwdriver to secure them, but that’ll often come with the doorbell.
Configure the Doorbell Application
To receive video from your doorbell on your phone or tablet, you must first download and configure the doorbell’s software on your device.
First, link your doorbell to your home’s Wi-Fi network with its associated app.
Once the doorbell is connected, you can adjust the motion sensitivity, individual detection, and video recording time. Homeowners generally agree that the default motion sensitivity is too high, so experiment with different sensitivities until you find one that works for you.
Attach and Configure the Doorbell Chime
Certain video doorbells have a plug-in chime.
If yours doesn’t, you may need to purchase one for your smart doorbell to function. When someone visits, the software on your phone sends a warning, but the chime notifies those in your household.
Once you set up the chime, follow the configuration directions in the doorbell’s wizard. You’ll typically connect to your wireless network and link the chime with your doorbell using the app.
How To Install a Hardwired Smart Doorbell
Hardwired smart doorbells are more challenging to install if you don’t have electrical experience.
However, only a few steps are involved, and most people can do it on their own successfully.
The primary focus when dealing with electric cables is safety. Therefore, consider the following to stay safe during installation:
- Use insulated tools.
- Avoid having wet hands while working with electricity.
- Always wear suitable sealed latex gloves and goggles.
- Never approach or attempt to patch any electrical devices or circuits that are near water.
- Never operate electrical equipment with frayed wires, faulty insulation, or missing plugs.
Remember, you can only install hardwired smart doorbells on homes with pre-existing doorbells.
Locate and Switch Off the Existing Doorbell’s Circuit Breaker
By turning off the circuit breaker that supplies electricity to your doorbell, you can safely work with the electrical wiring.
If you’re unsure which breaker switch powers the doorbell, consider turning them off one at a time to see if the doorbell continues to ring when pressed.
When the doorbell doesn’t chime, you switched off the correct circuit.
Examine Your Transformer
You’ll want to ensure that your transformer supplies the proper voltage for your new video doorbell, which is usually between 16 and 24 volts of alternating current.
To locate the transformer, open the doorbell’s chime box and trace the wire from the “trans” terminal.
The cable will lead you to the transformer.
If you have difficulty finding your chime, follow the sound when the doorbell rings.
Alternatively, you can inspect near your circuit breaker for the transformer in your home.
Numbers printed on the transformer should indicate the voltage.
If there are no estimates, use a multimeter to verify the current.
If the voltage on your transformer is greater than 24, you’ll need to modify it.
You can do this yourself by purchasing a new transformer and linking the wires from the old transformer to the replacement or hiring an electrician.
Conduct a Thorough Inspection and Rewiring of the Current Doorbell Chime
Remove your present chime’s cover and inspect the interior to see if it’s a mechanical or digital chime.
Does a tiny hammer strike a physical chime when you ring the doorbell? If so, you have a mechanical doorbell. Digital chimes, on the other hand, use small speakers that play music.
At this step, you’ll want to run the connecting wires from your chime to the location of the smart doorbell.
Some video doorbells have an amplifier that you need to include in the chime, regardless of whether it’s mechanical or electric. Add the amplifier before running the lines to your doorbell.
If you have a wireless chime, it’s a good idea to install a diode with your smart doorbell to reduce awkward noises.
Remove Your Current Doorbell
Disconnect the two terminal wires on the doorbell’s back after unscrewing it from your door frame.
While doing this, avoid harshly pulling the wire. Roughness can lead to breakage and make the installation process much more challenging.
Install the Video Doorbell
First, install the mounting bracket in the desired place.
You should pull the two doorbell wires into the bracket’s center hole before attaching the frame to the wall.
If the existing cables are too short to deal with, you’ll need to use push-on splices to connect extension wires.
Afterward, drill pilot holes in the bracket and screw them into the wall. Attach the wires to the two terminals on the video doorbell’s back while the mounting bracket is in place.
It’s best to push any excess cables into the wall before securing the doorbell to the frame.
Finally, add the screws included with your wired doorbell.
Power Up and Configure the Doorbell on Your Phone
You’re now able to power the circuit breaker and configure your new video doorbell.
Install the doorbell’s mobile app, build an account, and follow the setup directions. The program will create a link between the doorbell and your Wi-Fi.
Similar to the wireless version, adjust the sensitivity and other features to accommodate your home’s needs.
How To Optimize Your Smart Doorbell Placement
There are several ways to optimize the doorbell.
Your doorbell’s location, settings, and angle all affect its view and usability. Before finalizing your smart gadget’s location or app setup, consider the goals you have for it.
Here’s how you can enhance the performance of your doorbell:
Position the Doorbell 4+ Feet From the Floor
The doorbell’s optimum mounting height is about 4 ft. (48 in.) above the ground.
You must install your doorbell at this height regardless of where you choose to mount it.
That’s because you don’t want the motion detectors in your doorbell to sense gestures that are too far away from your home and trigger false alarms.
The 4 ft. recommendation is ideal for identifying people approaching the door without picking up events occurring outside of your door’s immediate area.
Depending on the unit’s capability, a four-foot spacing enables the motion sensors to monitor movement from a distance of almost 5 ft.
Place Your Smart Doorbell Where It Can See Visitors
Your unit’s orientation determines the camera’s field of view and the area from which you can draw motion zones. Most video doorbells can take images from five to twenty feet away from their current location.
Consider the direction an individual would take to reach your door while determining the device’s most suitable placement.
For instance, if a long pathway leads to your front door, it’s better to include it in the camera’s field of view.
This way, you can draw a motion zone around it and get notifications anytime visitors step on your front path.
Angle Your Doorbell To Avoid Too Much Natural Light
Generally, doors receive an abundance of direct sunshine. Since this intense light is concentrated in an excessively saturated environment, it can impair your device’s ability to detect changes.
If the gadget is pointed squarely at a porch opening, the outside area will look entirely white to the doorbell camera.
Since what the system sees is a blanket of light, it’s unlikely to identify that someone is approaching.
Adjusting the device’s angle allows you to concentrate on a particular region without blinding the camera with light.
How To Ensure Your Smart Doorbell Gets Strong Wi-Fi
You’ll typically mount a smart doorbell on an external wall, separated from the Wi-Fi router by thick structures (brick, cement, etc.). Unfortunately, these thick walls can limit the Wi-Fi reception at your front door.
A strong Wi-Fi signal is a must-have if you want a functional smart video doorbell.
Follow these steps to ensure that the doorbell always remains connected:
Evaluate the Strength of Your Wi-Fi Signal
First, you need to know how strong your Wi-Fi is. You can estimate your network’s power by sitting directly next to your doorbell and performing a speed test with your mobile device.
To do this, verify that your smartphone is on your Wi-Fi network, and then check your network’s upload rates utilizing a service like speedtest.net.
An upload speed of at least 2Mbs is ideal for most smart doorbells.
Additionally, you can confirm the Wi-Fi RSSI of the doorbell in its settings.
If the strength of your Wi-Fi is insufficient, consider using the following methods to improve the signal.
Make Use of the 2.4 GHz Frequency Band
If your router supports the 2.4Ghz band, connecting your doorbell to it will significantly improve your device’s connectivity and speed. 2.4GHz signals pass more easily through thick walls, resulting in a stronger reception at your doorbell’s location.
Think about relocating your wireless router as well.
Depending on the current configuration, placing your wireless router closer to the smart device’s position can significantly improve your doorbell’s video streaming output.
Add a Wi-Fi Extender to the Network
You can also enhance the signal around your doorbell by expanding the range of your network near your door.
The optimal location for the extender is approximately midway between your router and your smart device. Experiment with various positions and compare the outcomes.
Think About Upgrading the Internet Service Contract
If you have a slower Internet service plan, bear in mind that your smart doorbell also uses this signal.
A poor signal can hinder connectivity in some situations.
When the overall Internet access is strong, there’s a fair probability that your doorbell’s connectivity will strengthen.
If you want to keep a solid connection to your doorbell, opt for faster Internet service.
Do You Need Wi-Fi For Smart Video Doorbells?
All smart doorbells communicate with your mobile device through your wireless network while you’re away from home.
Without Wi-Fi, you can hear the doorbell when a guest presses the button. Still, you need Wi-Fi to display video and upload footage to the cloud.
Without a Wi-Fi link, the smart doorbell is essentially ineffective as a security measure.
How To Improve the Settings on Your Smart Doorbell
If your smart doorbell is connected to your Wi-Fi, there’s always a chance of hacking.
Hackers can gain access to your recordings and other smart appliances in your house. But there are ways to enhance your video doorbell’s security to prevent hackers.
Here are a few ways to optimize your smart doorbell for maximum security:
Take Into Consideration Concealing Your Network
When configuring your home network for the first time, you will be prompted to establish a publicly accessible service set identifier, abbreviated as an SSID.
The majority of routers are programmed with a manufacturer-assigned default network tag.
If your neighbors have a router from the same vendor, they’re likely to have the same SSID, which might create a security problem if all networks are unencrypted.
SSID exclusion allows you to conceal your network from anyone in your immediate vicinity, which prevents hackers.
It helps to hide the network your smart doorbell is connected to after installing it. To do this:
- Connect a laptop or phone to your Wi-Fi network.
- Open a browser.
- Enter your router’s IP address. This number is usually an eight-digit code found in your router’s user manual or printed on the device.
- Choose the advanced settings.
- Select your Wi-Fi security settings.
- Enable the SSID.
- Connect your smart doorbell to the hidden network using its app.
Opt for Two-Factor Authentication
Two-factor verification is an advantageous method to use when confidential data is at risk.
This method of signing in requires two distinct types of authentication.
The confirmation may be a mixture of a password and a PIN code or a combination of other measures.
You’ll need two devices to bypass the doorbell’s security measures.
By enabling this authentication process on the video footage and other configurations for your doorbell, unauthorized users cannot obtain access to your private files.
Activate Your Motion Sensor
If you want an alert anytime someone approaches your house, you can adjust your camera’s settings.
You can accomplish this by enabling motion warnings, which are messages sent anytime one of the gadgets detects motion in the general vicinity.
Certain doorbells also feature heat sensing, enhancing visitor detection while lessening false alerts triggered by variations in light. Change the sensitivity level on your doorbell if it doesn’t use a heat-sensing motion detector.
A lower sensitivity setting is usually more appropriate in high-traffic areas, whereas a higher sensitivity setting is more appropriate in low-traffic areas.
To change the doorbell’s motion sensitivity:
- Open the software associated with it and navigate to the “Settings” tab.
- Choose a doorbell from the available devices.
- To access advanced settings, scroll down.
- Adjust the slider for “Motion Sensitivity.”
Boosting the sensitivity will decrease the doorbell’s battery life. But this wouldn’t affect you if you have a hardwired doorbell.
Is There a Monthly Fee To Operate a Smart Doorbell?
There’s no recurring charge to use the smart doorbell, but you must pay a premium if you select a cloud storage package.
Otherwise, many doorbell systems allow users to view previous footage from internal storage.
Doorbell cameras can record for as little as three hours or as long as 60 days. With this in mind, if you ever use a cloud service, make sure you pick a package with enough storage space to fit recordings from your doorbell.
Can You Connect Security Systems to Smart Doorbells?
Doorbell cameras are ideal for home automation because they work with a variety of other components. But if you have a smart home setup, you’ll want to ensure that your doorbell camera works with any current or future security gadgets.
In most cases, a smart doorbell that uses IFTTT software can connect seamlessly with various security systems. Some IFTTT-enabled video doorbells come from:
- Ring
- Nest
- Remobell
For some functions, you may have to change the circuitry of your doorbell to include additional devices. You should consult a technician if that’s the case.
Benefits of Installing a Smart Video Doorbell Yourself
The primary benefit of installing your doorbell on your own is the savings associated with installation. On average, electrical services can cost between $100 and $250 to install a new doorbell.
This price involves connecting the power supply to an existing electrical outlet, routing the necessary new wiring, and mounting the doorbell.
By installing it yourself, you can save hundreds of dollars!
Additionally, you have complete discretion over the location of your smart doorbell.
Some homeowners may choose to have their doorbell located somewhere other than the front door. In that case, self-installation gives you complete control over the style of your house.
Should You Hire an Electrician?
Wireless smart doorbells are generally easy to mount without hiring a professional.
On the other hand, it’s a good idea to call an electrician to install wired doorbells.
Among other advantages, contacting a professional technician eliminates the risk of poor wiring.
Hiring a technician to do the construction also reduces the need for you to spend hours figuring out doorbell placement complexities, making this the most convenient and secure choice by far.
How To Secure Your Smart Doorbell From Theft
If criminals are committed to violating your home, they’ll target your smart doorbell because it’s the first security measure they’ll face.
While you cannot entirely protect your device, there are things you can do to reduce the likelihood of someone stealing it.
Consider a Protective Container
You can use a grid box to protect your doorbell, which you should bolt down to the frame or wall.
Additionally, you can mount the doorbell in a steel case. However, you must ensure that the camera’s vision remains free from obstruction.
If your doorbell’s manufacturer doesn’t offer containers, find covers online available in different materials. Choose a container with a lock for added protection.
Have a Visible Security Sign
An analysis conducted on the Newcastle University campus discovered that displaying warning signs reduced theft by more than fifty percent.
It helps to install an easily identifiable sign to alert suspected criminals that the area is being monitored.
How To Know if Your Smart Doorbell Is High-Quality
It’s hard to know the difference between a good smart doorbell and an excellent one. An excellent smart doorbell generally has the following qualities:
- Clear and identifiable video and audio quality
- Simple to use
- Safe against hacking attempts
Delay Period
It also helps to review the doorbell’s delay period. A quick response time indicates no communication issues between the time the user presses the main button and the time you receive a notification.
Prompt transmissions are the sign of an excellent doorbell.
Device Resolution, Field of Vision, & Zoom
You should also always verify the resolution of the device.
Resolutions vary from 480p to 1080p, with the higher resolutions offering a more detailed image. 1080p is the industry standard and will deliver a crystal-clear shot.
Another factor to consider is the camera’s field of vision. A perfect smart doorbell should have a 180-degree field of vision in both vertical and horizontal directions.
To see the most detail, your video doorbell should also allow for physical zooming, typically called “optical zoom.” Alternatively, pick a doorbell that permits visual zooming using the app.
Night Vision
A video doorbell with night vision is a high-caliber device. Your camera’s night vision feature permits you to observe what’s going on in complete darkness.
Most doorbell cameras have infrared night vision, which captures thermal video at night. However, there are color night vision cameras available at a slightly higher price tag.
Weather Resistance
Your camera should also be weather resistant. Due to the camera’s location on the front porch, it’ll be vulnerable to elements and temperature variations.
With this in mind, ensure that the doorbell camera you select is sturdy enough to survive the climate in your area. The device’s specifications will define the temperature range it can handle.
A Note About Smart Doorbell Quality
Notably, if your doorbell doesn’t meet these requirements, that doesn’t mean you should dispose of it or that it’s a poor-quality doorbell.
As long as it meets your home’s security requirements, your smart doorbell is appropriate.
How to install a smart video doorbell: Final Thoughts
Installing a video doorbell is straightforward once you have the right tools.
As a homeowner, mounting the doorbell is a simple task; however, tenants may not want to tamper with their current doorbell system. If you rent, the most convenient choice is to get a wireless video doorbell.
Once installed, keep your device’s data protected and remember to update its firmware regularly.
If you haven’t decided on the smart doorbell for your home, The Deal Guy has a video on popular video doorbells that can protect your home: